To learn Arduino, I've bought the Arduino Starter Kit. It contains an Arduino board, together with components needed for basic projects and a book that describes the projects.
The first steps for me is to simply follow the examples in the book. I won't discuss this in detail in the blog, unless I do interesting findings.
Setting Up the Integrated Development Environment
Instead of downloading an Integrated Development Environment for Arduino, I decided to go for the web based option. The compilation of the code is done in the cloud (AWS). A small plugin (Arduino Create) is still needed on my laptop to handle the communication to the board.
Following the Book
From an engineering point of view, this isn't that interesting - but it was an important step. I needed to get my hands dirty and learn how to read the markings on the resistors, understand the difference between the long and short leg of diodes and understand why defensive programming is a good thing.
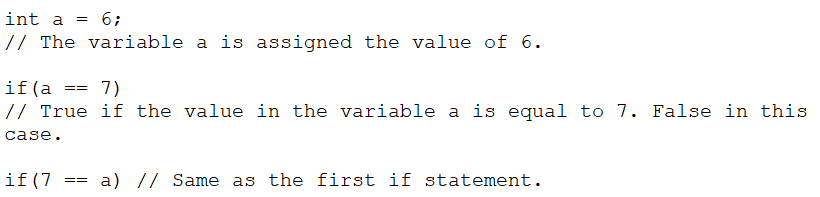
 |
| It is easy to make the first typo. I did it, and I spent quite a while finding that bug. If I had compared 7 to "a", the compiler would have complained immediately. |
One of my favorite projects was the Crystal Ball, where a tilt sensor is connected to the board together with a Liquid Crystal Display. When the tilt sensor is activated, a random number is sent to the display.
 |
| The black box on the right side is the tilt sensor - a little metallic ball that closes a pair of connectors when the box tilts. |
No comments:
Post a Comment